Tasks | Creating and Configuring Tasks
Introduction
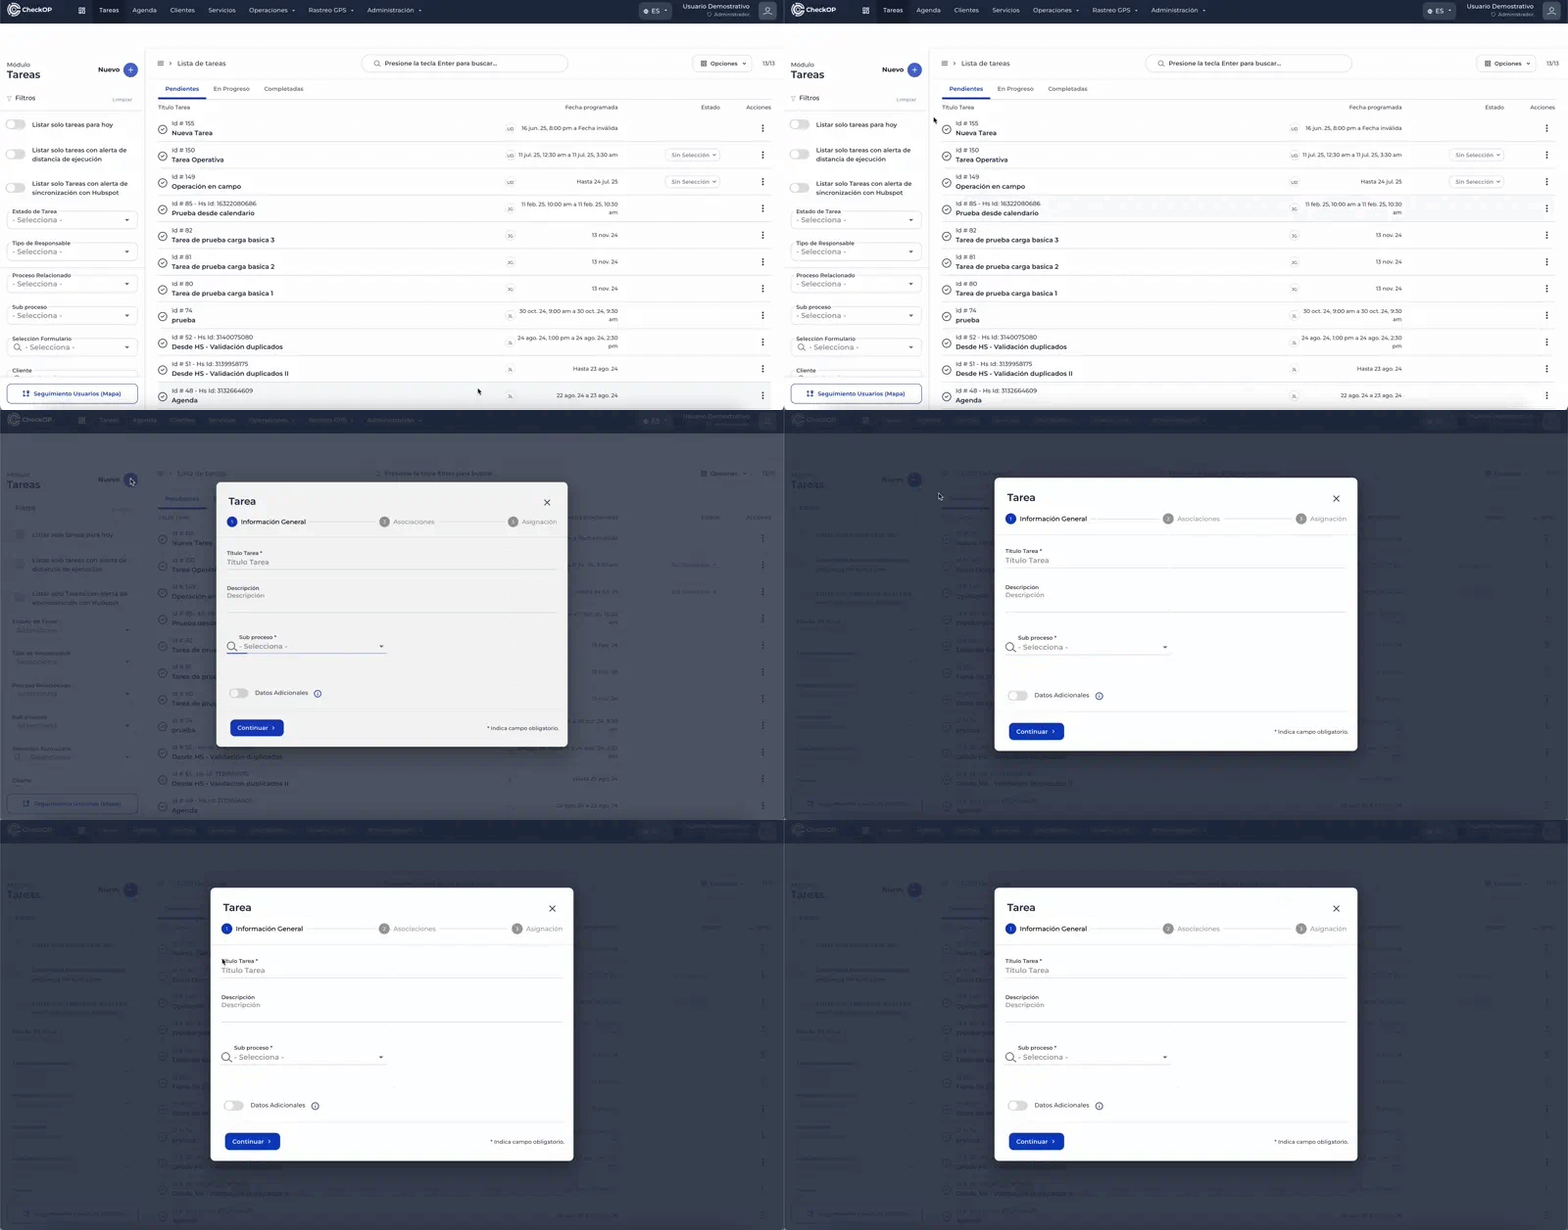
The Tasks module in CheckOp offers an intuitive interface to visualize and consult the status and details of all operational activities. This functionality is crucial for supervisors and executors, allowing efficient monitoring and quick access to relevant information for each task.
Create Task
This is the main functionality that allows you to start and configure a new operational activity on the platform, following a series of detailed steps.

General Information
-
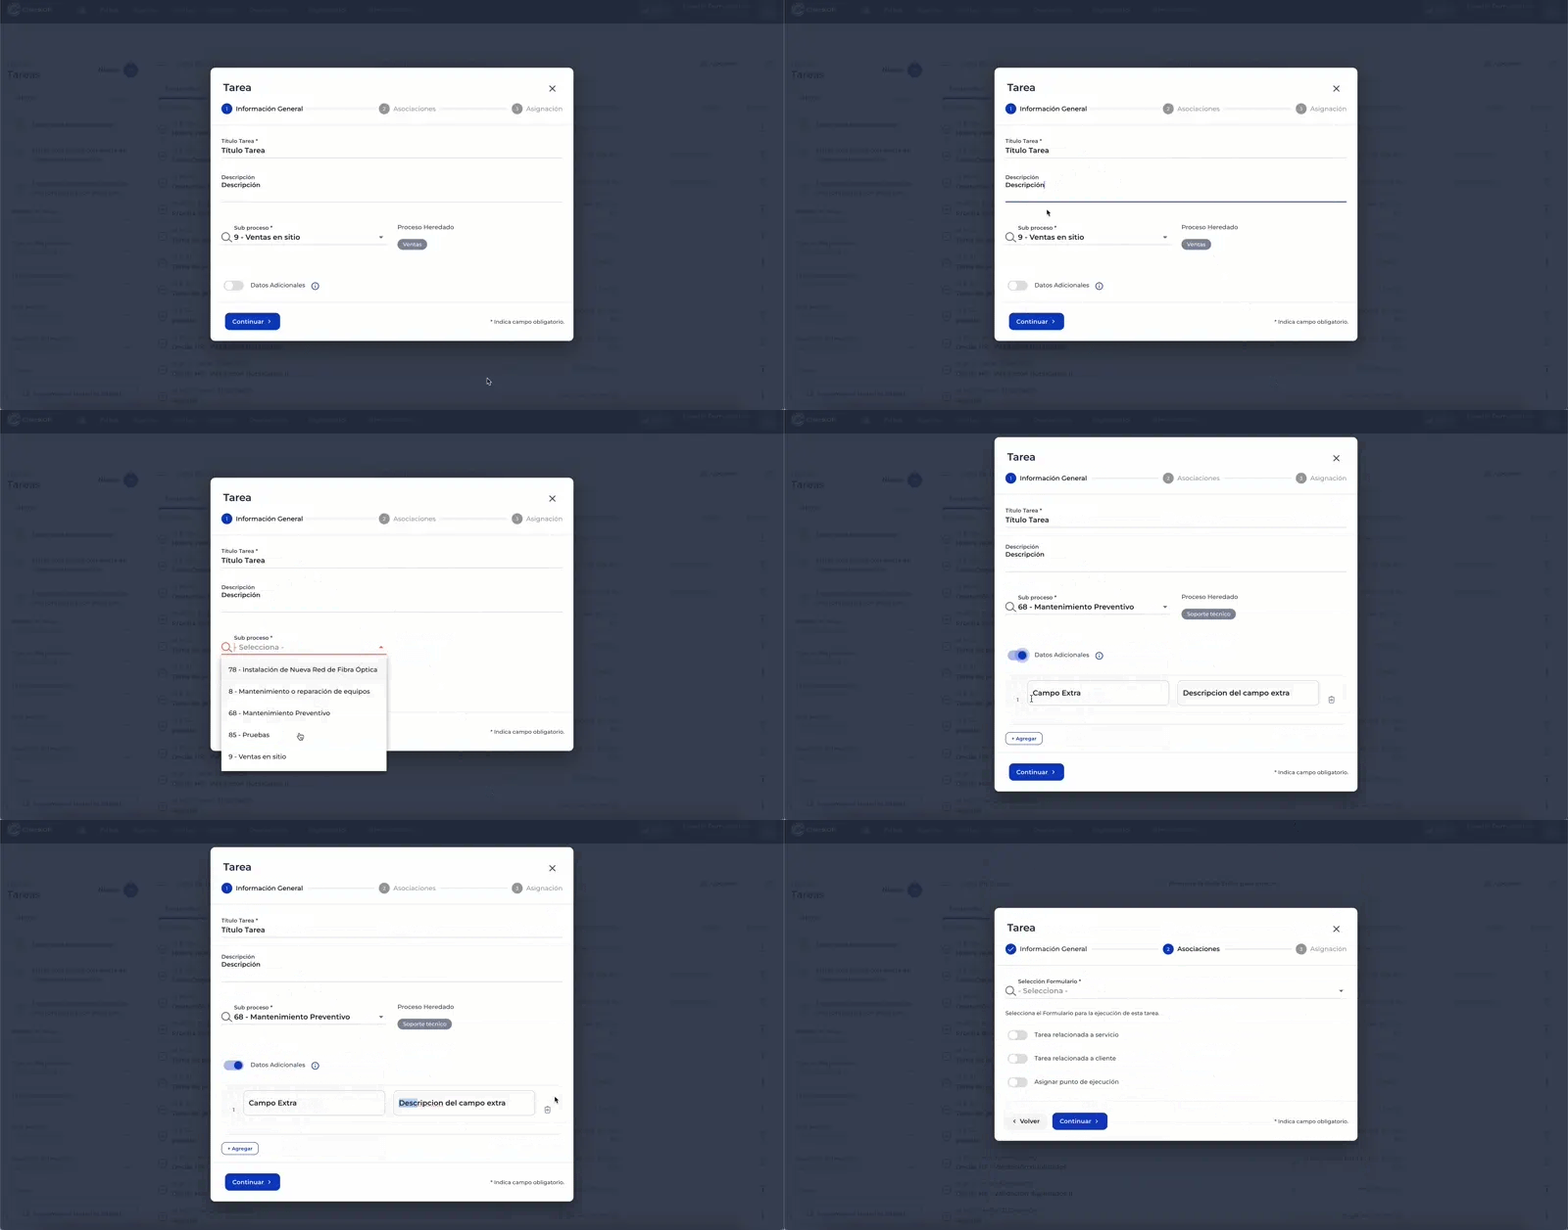
Task Title: Enter the name or main heading of the task. This is a mandatory field and must be descriptive.
-
Task Description: Provides detailed preliminary instructions, context, background or any relevant information that the executor should know.
-
Associated Sub-Process: Selects the sub-process to which the task belongs. The parent process will be established automatically, establishing the operational hierarchy.
-
Additional Data: If necessary, add up to four blocks of extra information that the executor will be able to view before starting the task. You can use:
-
Text Fields: For information such as "Site Contact Name", "Emergency Phone", "General Remarks".
-
Files: To attach reference documents, plans, manuals, photos or any file necessary for the execution.
-

Associations
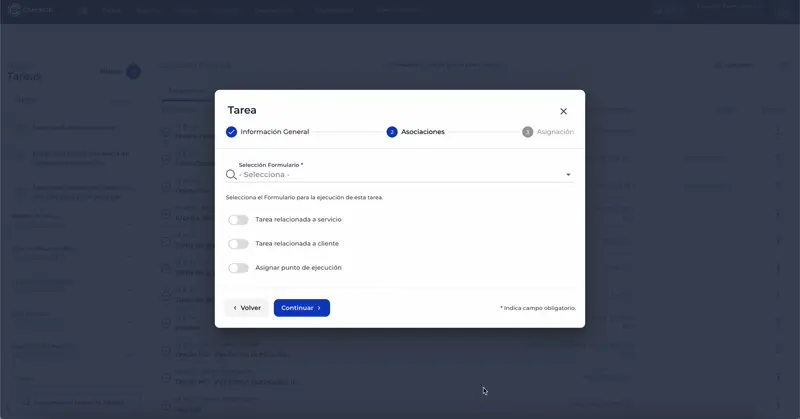
This section links the task with other CheckOp modules to enrich its context and functionality.
-
Data Entry Form: Selects a previously created form to be completed by the technician during the execution of the task.
-
Related Service/Product (Optional): Associates one or more services or products relevant to this task.
-
Associated Customer (Optional): Links the task to a specific customer in your database[cite: 4].
-
Execution Location:
-
Client Location: If a client is associated, you can select its predefined geographical location as the execution point.
-
Custom Location: If the task does not run at the main location of the customer or is not associated with a customer, define a custom execution point directly on the map by searching for a specific address.
-
-
HubSpot Integration Options for Subtasks (Advanced): If HubSpot integration is configured and applied, you can find an option to define whether subtasks derived from this task will travel to HubSpot as tickets, depending on the previous configuration in forms. This option can also include sending subtask reports to the parent task in HubSpot.

Assignment
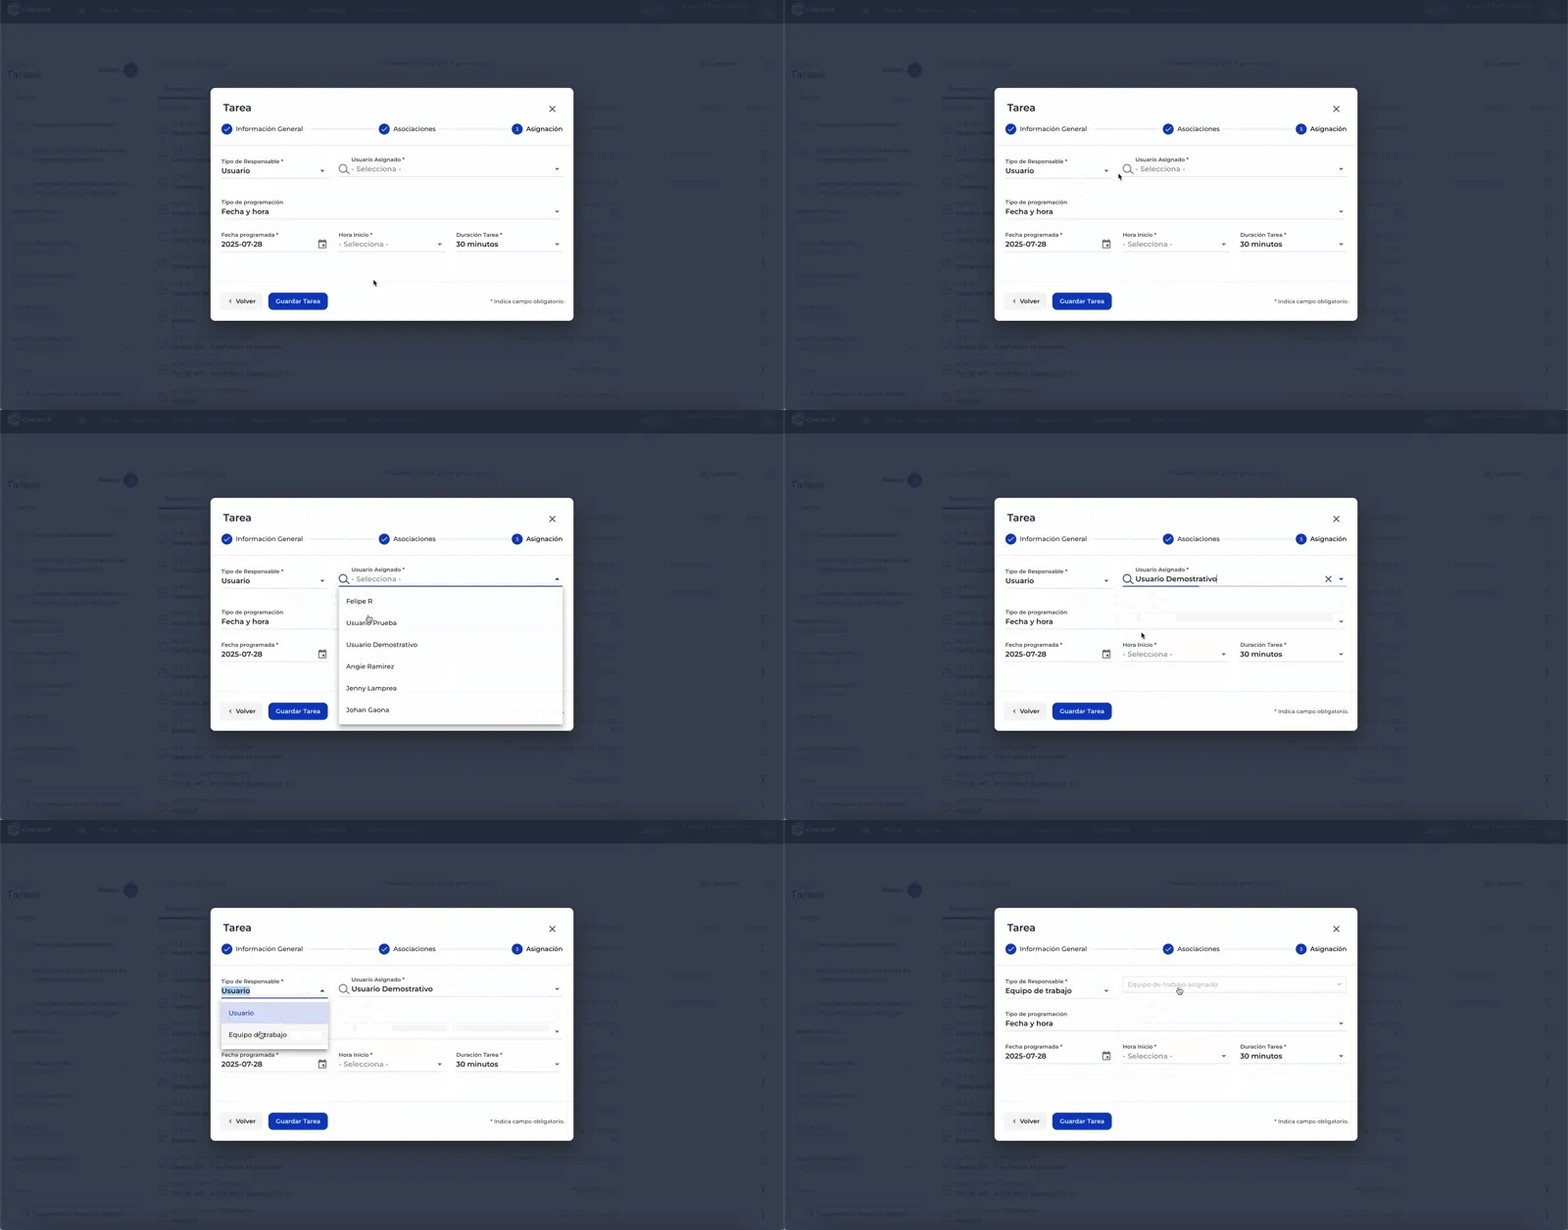
This section establishes who is responsible for the task and how it is scheduled to be performed.
-
Type of Responsible:
-
User: Assigns the task to a specific user of the platform.
-
Work Team: Allows filtering and assigning the task to a member of a specific work team.
-
-
Schedule Type: Selects how the task fulfillment will be measured. There are three types:
-
Date and Time Specific: The task must be executed on an exact day and time, with a predefined duration (e.g., 15 min, 30 min, 1h, up to 12h). The system will indicate whether the task was executed early, on time or late.
-
Date Range: The task must be completed within a period of several days (start date and end date). Ideal for activities that require more than one day.
-
Deadline: The task must be executed no later than a specific date. The system will indicate whether the task was completed before or after the deadline.
-

Important: Once you have completed all the fields, click on the "Save" or "Create Task" button to finish the process.