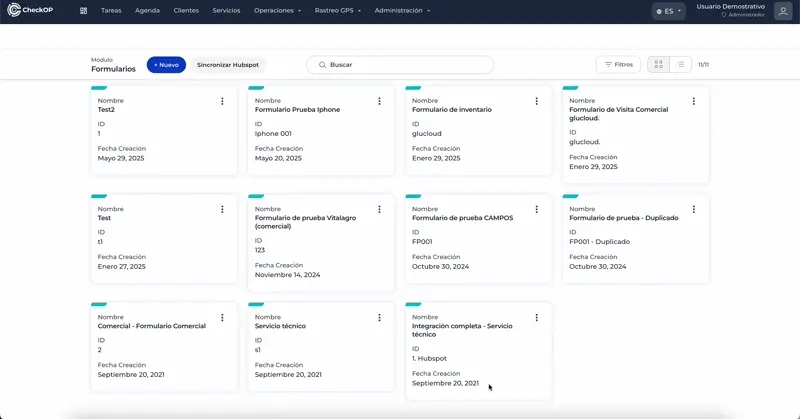
Operations | Forms
Introduction
The Forms module in CheckOp is an advanced tool that allows you to design, customize and manage forms for the detailed collection of information during operational tasks. It is essential for capturing specific data in the field and adapting to the needs of each task.
Function Location
This functionality can be found in: Operations → Forms
Create Form
Allows you to start the creation of a new form, assigning it a descriptive title and a description for easy identification. It is also possible to add an internal alphanumeric code and to define the activity status of the form (active/inactive).
Process:
- Select the "Create Form" option.
- Complete the required fields:
- Form Name:
- Description
- Internal Code (Optional)
- Activity Status: Defines if the form will be "Active" (visible to associate to tasks) or "Inactive" (hidden while it is being built or revised).
- Review the Capture Restrictions.
- Start editing the form.
- Save the form.
Capture Restrictions
Allows you to define whether the tasks that use this form must necessarily capture the geographic location of the place of execution. If this option is enabled, the mobile application will require the geolocation to start the task.
-
When creating or editing a form, locate the "Capture Restrictions" section.
-
Check or uncheck the "Enable/disable geographic restriction to form" option as needed.
-
Save the changes to the form.
Form Editor
Sections
Add/Edit Form Section
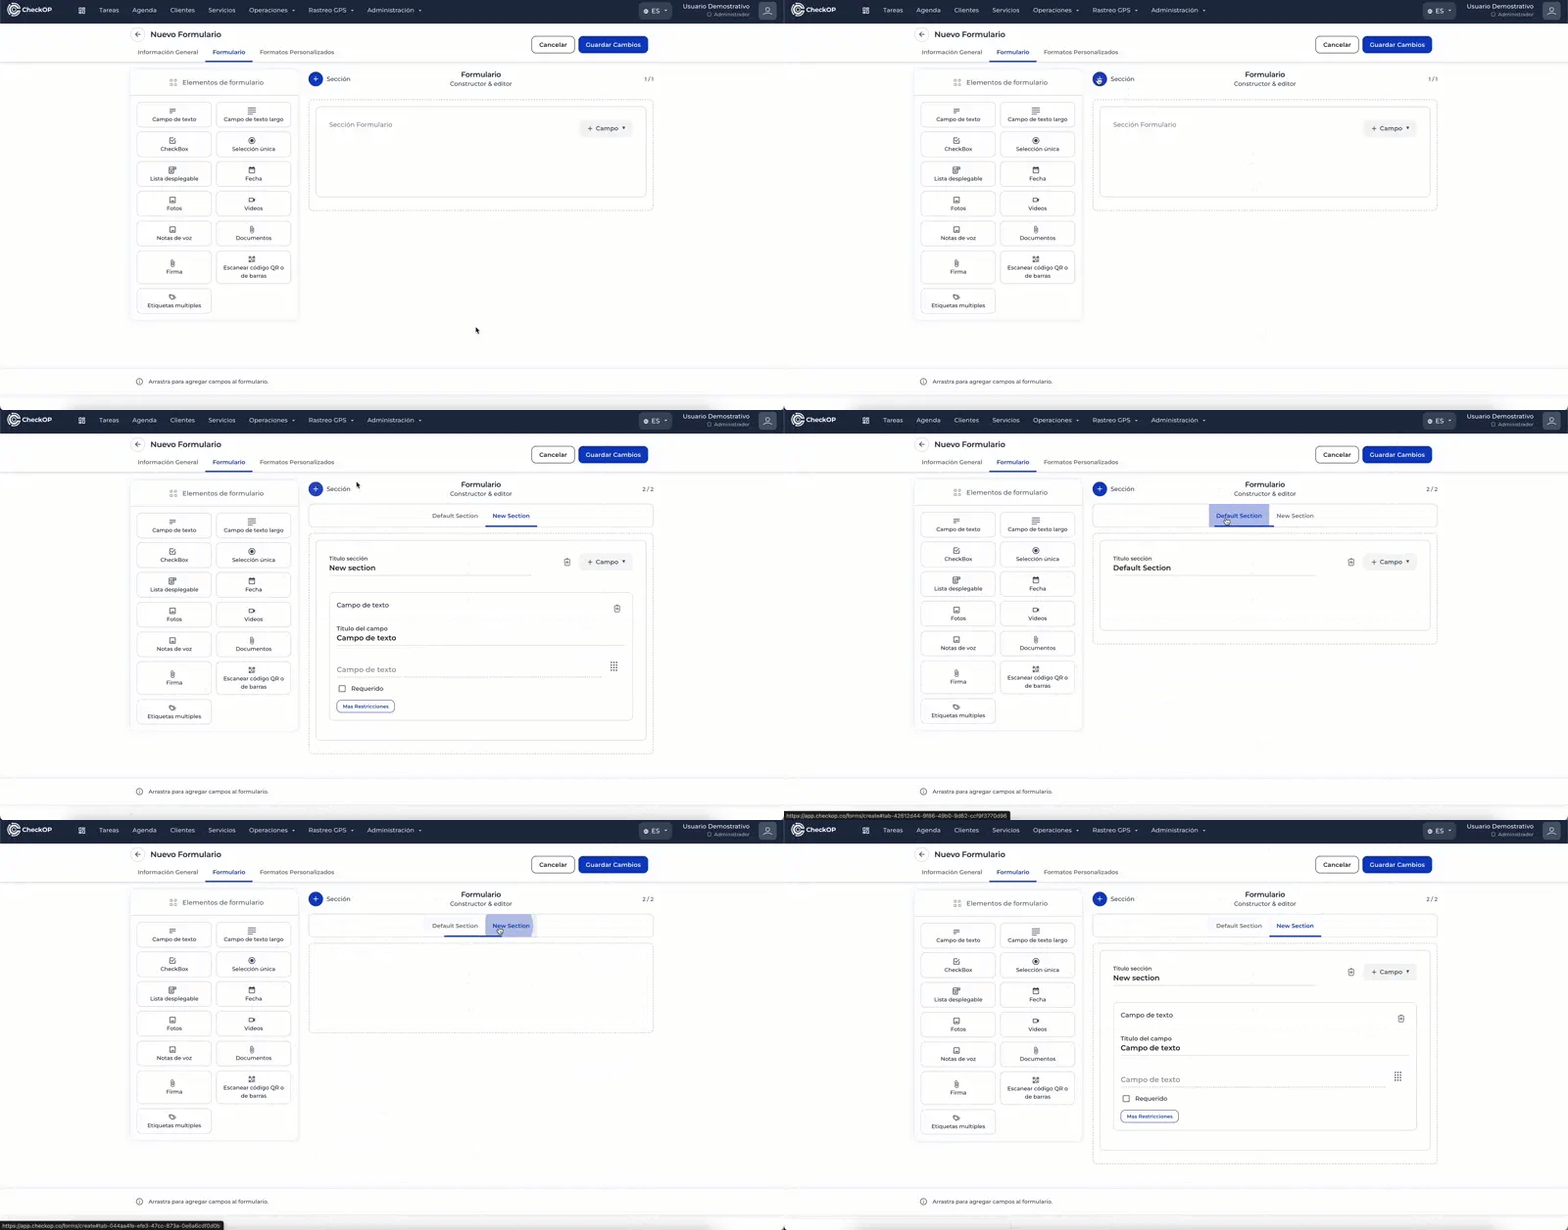
Remove Form Section
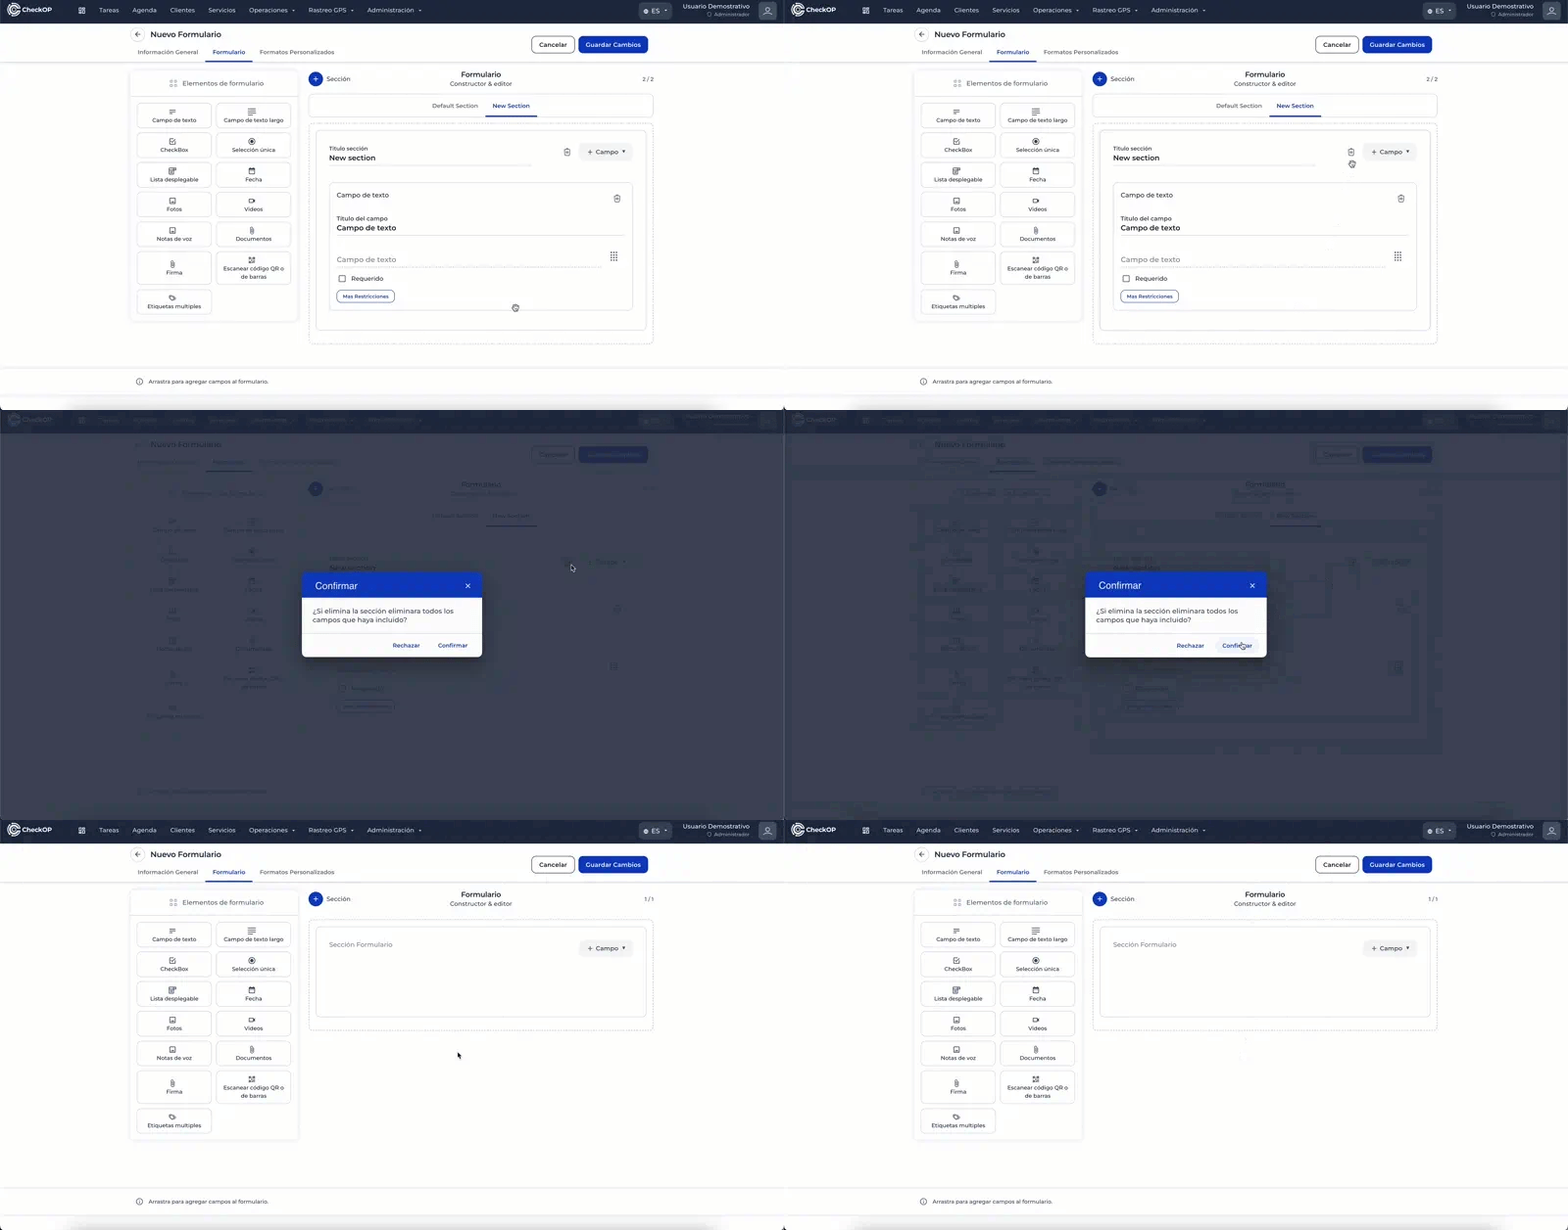
Fields
This subsection describes the different types of fields you can add to your form, along with the specific restrictions you can set for each.
1. Text Field
Detailed Restrictions:
- Required: You can mark this field as required, which means that the user will not be able to submit the form if it has not been completed.
- Email Format: If the field is for an email address, you can set this restriction so that the text entered has a valid email format (e.g., usuario@dominio.com).
- Numeric Format: Allows you to ensure that the data entered is exclusively numeric. Useful for fields such as "Invoice Number" or "Quantity".
- Minimum Length: Defines the minimum number of characters the user must enter in the field.
- Maximum Length: Sets the maximum number of characters allowed in the field.


2. Long text field
This field is perfect for capturing longer textual information that requires multiple lines of input. It is ideal for detailed descriptions, observations, comments, notes or incident reports where space is needed to elaborate.
Detailed Restrictions:
- Mandatory: You can make this field mandatory before the form can be submitted.
- Minimum Length: Defines the minimum number of characters required for the description.
- Maximum Length: Sets the upper limit of characters the user can type.


3. CheckBox field
This field allows the user to select one or more options from a predefined list (in case it is a group of checkboxes) or simply answer with a "yes" or "no" (if it is a single checkbox). It is versatile for quick surveys, checklists or to indicate the presence/absence of something.
- Required: you can make selecting at least one checkbox (or checking a single checkbox) mandatory to submit the form.
- Requires at least X selections: If you have a group of checkboxes, you can configure that the user must select a minimum number of options.
- Maximum X selections: If applicable, you can limit the maximum number of options a user can select in a group of checkboxes.

4. Single Selection Field
This field presents the user with a list of predefined options, from which only one can be chosen. It is ideal for standardizing responses and categorizing data in a uniform way, such as the status of a piece of equipment (Operational, Under Maintenance, Out of Service) or the type of service performed.
- Mandatory: You can make the selection of an option mandatory.
- Define Options: You must predefine the options that will appear in the list for the user to choose from.

5. Expandable List Field
Similar to "Single Selection", this field also allows the user to choose only one option from a predefined list. The main difference is the visual presentation: the options are hidden in a drop-down menu until the user clicks, saving space on the form. Useful for long lists or for categorizing information (e.g., countries, incident types, product models).
Detailed Restrictions:
- Required: selection of an option may be required.
- Define Options: You must configure the options to be displayed in the drop-down menu.

6. Date field
This field is specifically designed to record dates. It is essential for documenting key moments related to the task, such as start date, completion date, inspection date, next visit date or any other time milestone.
Detailed Restrictions:
- Required: you can configure the field to make the date a must-have.
- Date Range Allowed: Restrict the dates that can be selected to a specific period (e.g., only future dates, dates within the last month, etc.).
- Default Date: You can set a default date (e.g., the current date).

7. Field Photos
This field is vital for visual documentation, allowing users to capture and attach one or more images directly from their mobile device or upload them from their gallery. It is essential for documenting before and after status, damage, evidence of work performed, specific locations or any visual aspect relevant to the task.
Detailed Restrictions:
- Mandatory: You can require at least one photo to be attached.
- Indefinite Number of Photos: Allows you to attach an indefinite number of photos.
- Minimum Number of Photos: Defines the minimum number of images that must be captured or attached.
- Maximum Number of Photos: Limits the total number of images allowed for the field.
- Maximum File Size: Sets the maximum size in MB (Megabytes) for each individual image.
- File Capture Type: Specifies whether the user is allowed to upload photos by taking them from the app, upload them only from the device files, or both.


8. Field Videos
Allows users to record or attach video files, which is extremely useful for documenting processes in motion, equipment operation, demonstrations, failures or any situation requiring dynamic testing.
- Mandatory: You can make capturing a video a requirement.
- Indefinite Number of Videos: Allows you to add an indefinite number of videos.
- Minimum/Maximum Number of Videos (Optional): You can control how many videos can be attached.
- Maximum Duration: Limits the maximum length of the video.
- File Capture Type: Specify whether the user is allowed to upload videos by taking them from the app, upload them only from the device files or both.
- Enable low quality recording: decreases the weight and quality of the video.


9. Voice Memo Field
This field offers the flexibility to record and attach voice messages. It is ideal for capturing quick observations, spoken descriptions or details that would be cumbersome to type manually, allowing for streamlined documentation in the field.
- Mandatory: You can make the recording of a voice memo required.
- Maximum Duration: Set a time limit for the voice memo recording.
- Indefinite Number of Voice Memos: Allows you to set an indefinite number of voice memos.
- Minimum/Maximum Number of Voice Memos (Optional): Controls how many voice memos can be attached.

10. Documents field
Allows users to attach relevant files or documents directly to the form. This is useful for including PDFs with manuals, inventory spreadsheets, blueprints, signed contracts or other reference or evidence files.
- Mandatory: You can require at least one document to be attached.
- Maximum File Size: Define the maximum size in MB (Megabytes) allowed for each document.
- Indefinite Number of Files: Allows you to attach an indefinite number of files.
- Minimum/Maximum Number of Documents (Optional): Allows to control how many documents can be attached.

11. Signature field
This field enables the capture of digital signatures directly on the form, either from the user completing the task or from a third party (such as a customer or supervisor). It is essential for obtaining confirmations, work approvals, delivery/receipt minutes or to validate the completion of an important activity.
- Mandatory: Signature fields are always required and cannot be edited once saved.

12. QR Code Field
This field allows the user to scan a QR code or barcode directly with their device's camera. It is ideal for quick and accurate identification of assets, products, locations or personnel, linking the task to a specific physical item. Upon scanning, the field will capture the encoded information.
Detailed Restrictions:
- Mandatory: You can make scanning a QR code/bars a required step.

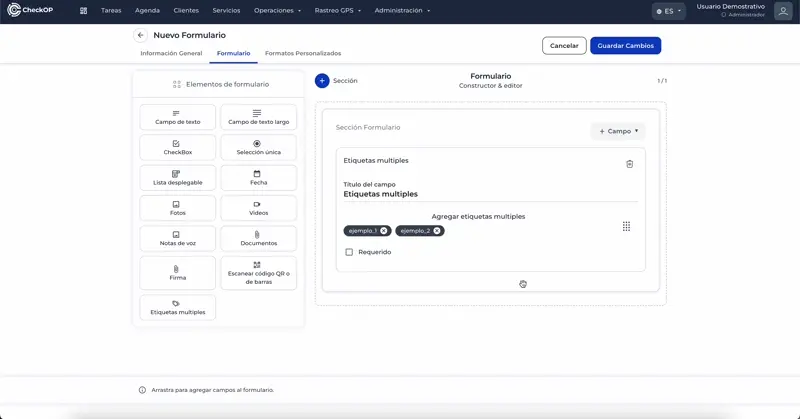
13. Multiple Label Field
Description: This field allows the user to select various options from a predefined list, displaying them as "labels" or "tags" once selected. It is ideal for classifying a task with multiple characteristics or attributes, such as types of reported problems (e.g., "Leak", "Noise", "Electrical Failure") or required skills.
Detailed Restrictions:
- Mandatory: you can make it so that the user must select at least one tag.

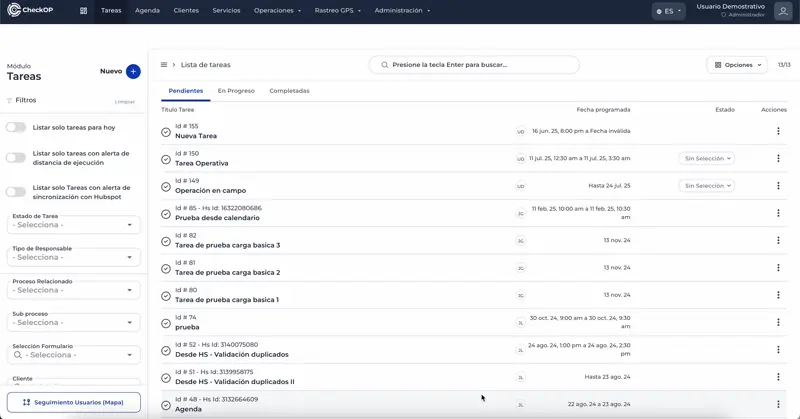
How does it work?
The Tasks module in CheckOp provides a robust platform to control and monitor all operational activities. Once the previous administrative components (users, teams, processes, sub-processes, forms) have been configured, this module enables.
Move property sort order position added to form structure
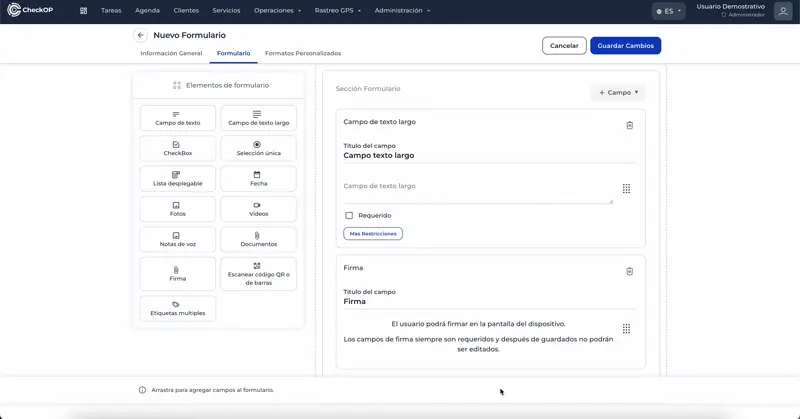
Remove property added in the form structure
