

Task Planner | Create, open and delete periods
Introduction
The period holds the commitment: a date range with its owners, cutoff date and daily client limit. A coordinator creates and opens it. Creating requires Planning with Create, editing and opening require Edit, and deleting requires Delete. See Permissions.
Create a period
Step by step:
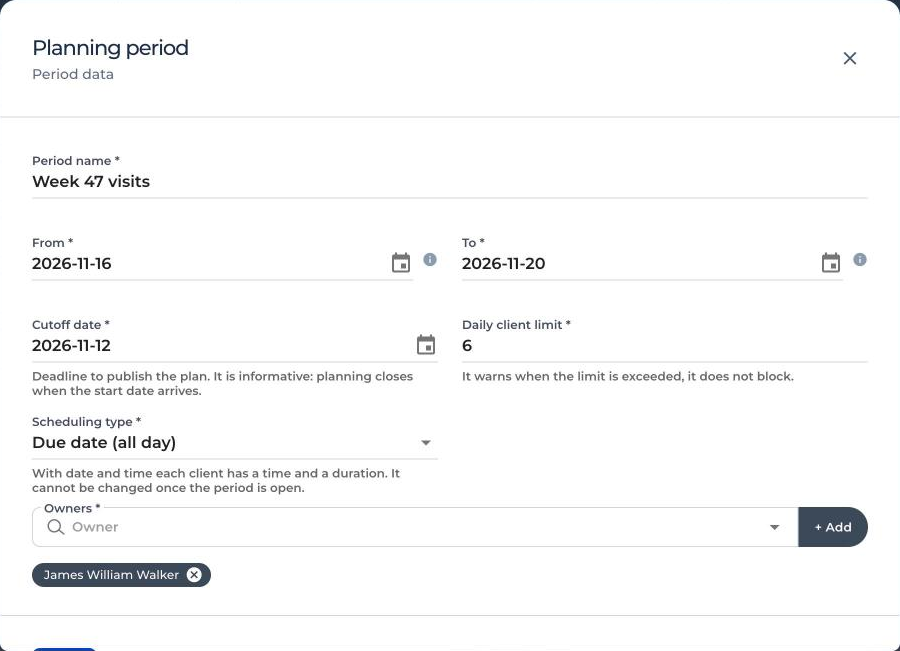
- Go to Planning and click New. The Planning period window opens.
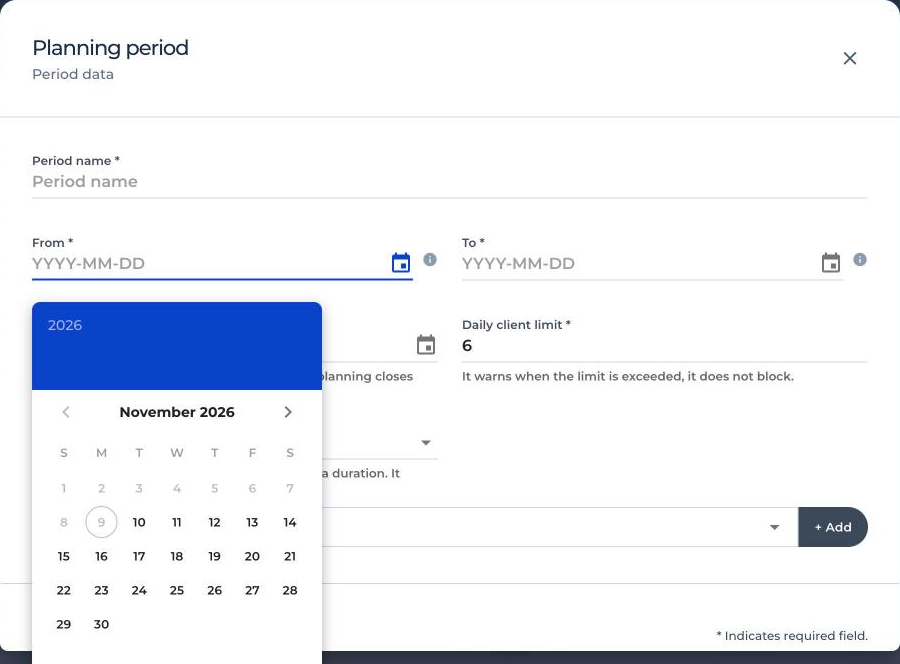
- Enter the name and choose the From date. The calendar only allows dates from tomorrow on.
- Choose the To date, same as or later than the start.
- Set the Cutoff date. It can only be between today and the day before the start. It is the deadline you give the team to publish and it does not block anything.
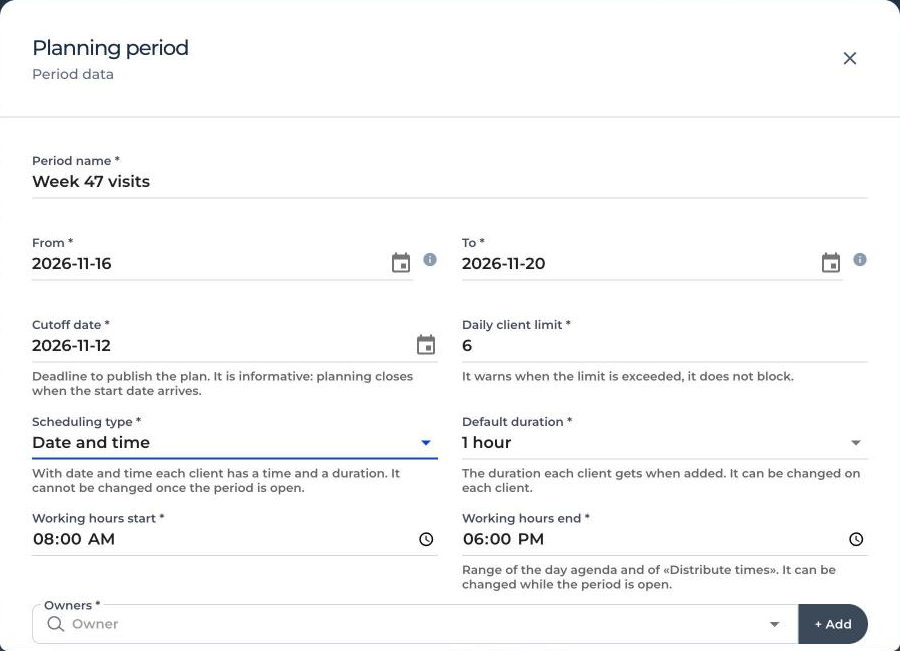
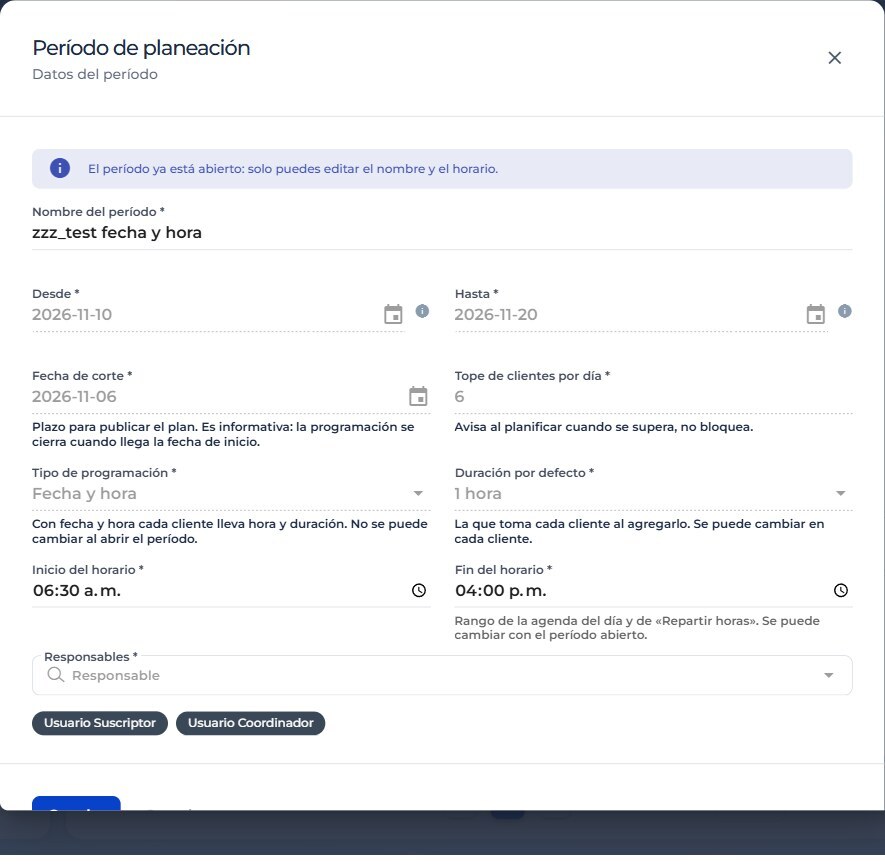
- Choose the Scheduling type: Due date (all day) or Date and time, where each client has a time and duration. With Date and time, also fill in the Default duration and the working hours (Working hours start and Working hours end, 08:00 to 18:00 by default).
- Adjust the Daily client limit (6 by default, used only as a warning) and add the owners: type the name in Owners, select it and use + Add.
- Click Save. The period is saved in Draft.
Overlapping periods
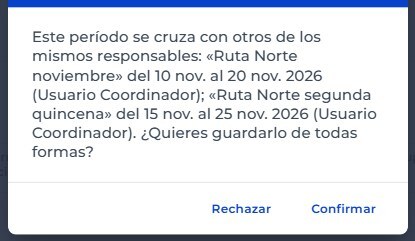
If the period overlaps in dates with another period that is not closed and shares an owner, CheckOP warns you before saving. Use Confirm to save it anyway or Reject to adjust dates or owners. A person with only Create sees «Another period», without the name.
Period fields
| Field | Required | Rule | After opening |
|---|---|---|---|
| Period name | Yes | Free text. | Editable |
| From | Yes | Later than today. Marks the move to In progress, which is when scheduling closes. | Fixed |
| To | Yes | Cannot be earlier than From. The next day the period moves to Closed. | Fixed |
| Cutoff date | Yes | From today and before From. It is a reference deadline: it does not change the status or block. | Fixed |
| Scheduling type | Yes | Due date (all day) or Date and time. | Fixed |
| Default duration | With Date and time | Applied to each client when added. Can be changed per client. | Fixed |
| Working hours start and end | With Date and time | Range of the day agenda and of Distribute times. The start must be earlier than the end. | Editable |
| Daily client limit | Yes | Whole number greater than zero. 6 by default. Warns, does not block. | Fixed |
| Owners | At least one | Account users. Each one has their own plan. | Fixed |
The period list
The main Planning screen lists the periods with these columns: Period name, Status, Cutoff date, Owners, Daily client limit and Published / scheduled. Columns can be hidden, but at least one must remain.
You can search by name and filter by status, owner and date range. Each row has an Actions button with Plan, Edit, Open period (Draft only) and Delete (with Delete permission only). In Draft, Plan is disabled and explains: «Open the period to start planning». Clicking a row opens the period panel on the right with its data and the Plan button.

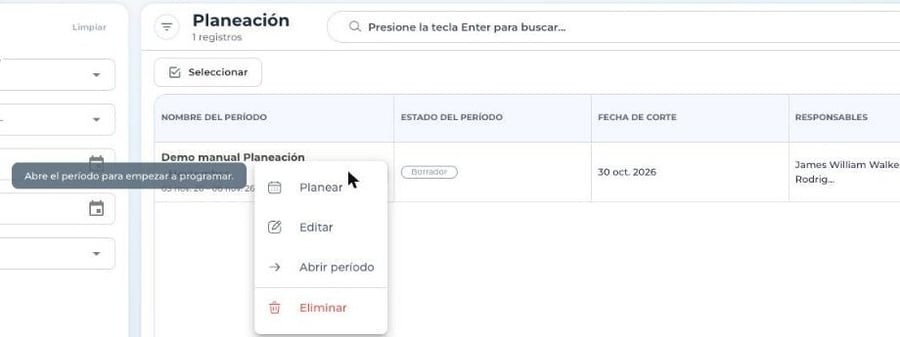
Open the period
Opening is what allows owners to schedule. It requires Edit and cannot be undone.
Step by step:
- Review the Draft: dates, cutoff, scheduling type, limit and owners. If something is wrong, edit it or delete the period.
- In the period row, open Actions and choose Open period.
- CheckOP shows the Confirm window. Use Confirm to open it or Reject to keep it in Draft.
- Let the owners know. Opening does not send a notification: they will see the period in their Planning list.
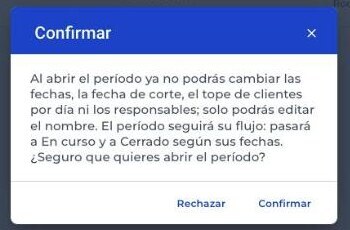
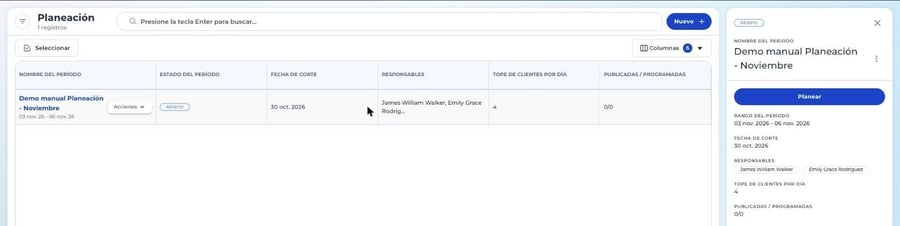
Important: if the start date of a Draft has already arrived, CheckOP does not open it. Edit the dates so the start is later than today and try again.
What can be edited after opening
In a due date period only the name can be changed. In a Date and time period the name and the working hours can be changed.
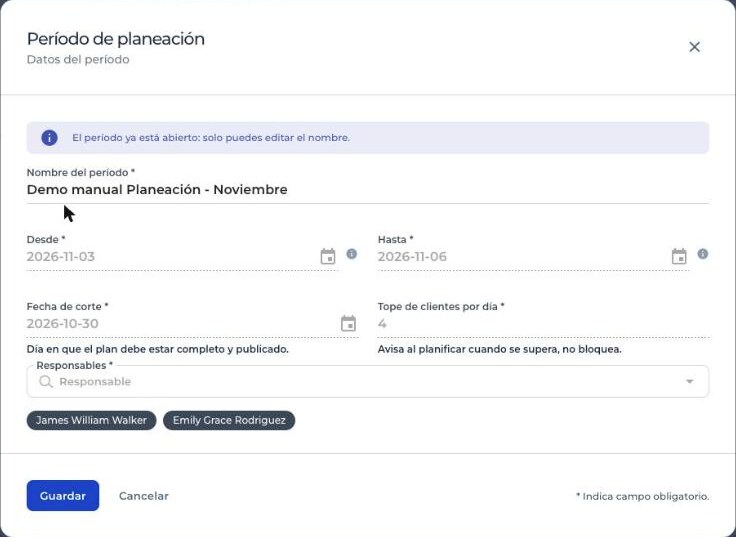
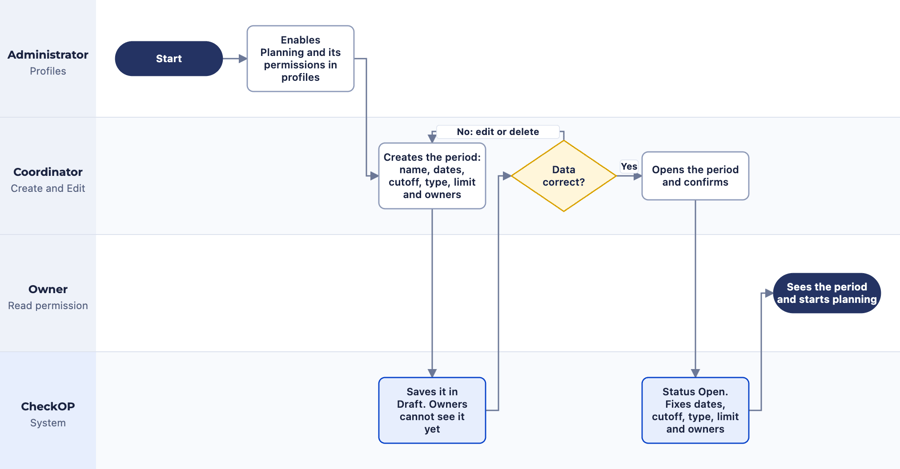
Preparation and opening flow
The administrator enables the profiles, the coordinator creates and reviews the Draft and, when it is opened, the period becomes available to owners.
Delete periods
Periods can be deleted in any status: Draft, Open, In progress or Closed. Use it to clean up test periods or periods created by mistake.
Step by step:
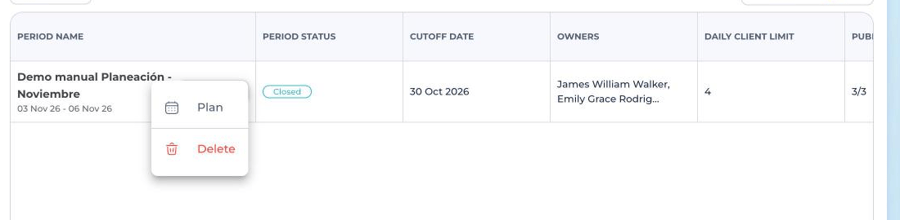
- In the list, open Actions and choose Delete. To delete several at once, use Select and the bulk action.
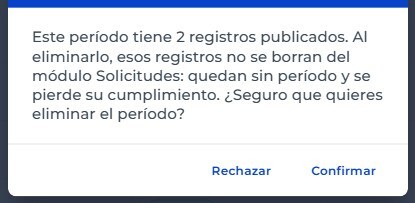
- Read the confirmation. If the period has published records, it states how many and what happens to them.
- Click Confirm. It cannot be undone from the screen.
What happens to published Tasks
Published Tasks are not deleted. They stay in the Tasks module with their owner, date and status, but they stop being period Tasks: they no longer have the date limit or require a reason, and they can be deleted from Tasks with the usual flow. The compliance of that period is lost.
Note: the screenshots in this article show the interface in Spanish.